 |
DIY • Do it Yourself • Weekend Projects • BIG Projects • LITTLE Projects | |||||
|
DIY • Do it Yourself • Weekend Projects • BIG Projects • LITTLE Projects | |||||
How Do I Share My How-To?It's really pretty easy, pictures and videos of the steps it takes to complete your project are stored on YouTube and picasaWeb. Once your "final" video is stored on YouTube, your project will show in the listings on the site. All this is controlled by our Creator's Tools. Basically, you start a project by writing up the project idea. Step 1. Sign up for a free Creator's Account to gain access to the Creator's Tools. Step 2. Login Step 3. Push the "Create New Project" button on the Creator's Tools. Make a name (you can change it later) for your project. And describe your plans to use as notes to guide the creation of the steps. Step 4. When you've finished providing all the steps to your project, shooting the videos and saving to google video via the Creator's Tool Panel, you are ready to write the introductory paragraph with an interesting story of how you did it, or how you do it in the case of a professional services presentation. Step 5. Last but not least create and upload the video (to YouTube) which is the video that will be used to summarize the project. If you were building a robot, this final video would show the robot running around, doing fun things that will inspire others to create their version of your project. That's it... Watch the views and ratings for your project pile up along with the sales commissions! Or get a customer because you showed how you remodel a house. |
FAQ About Becoming A CreatorQ. Why would I go to all that work, building something, then put it on a website like C What I Can Do? What's the point? A. Actually, there are a couple of forms for a reward:
|
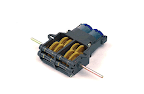
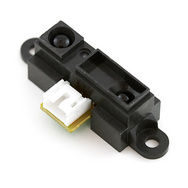
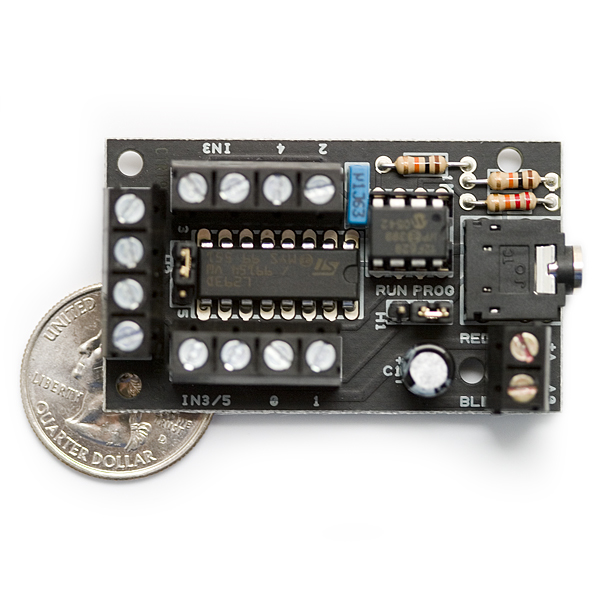
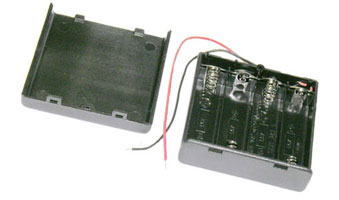
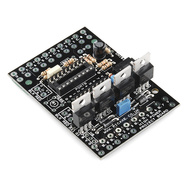
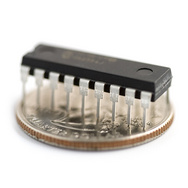
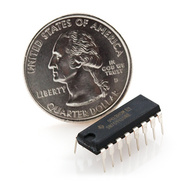
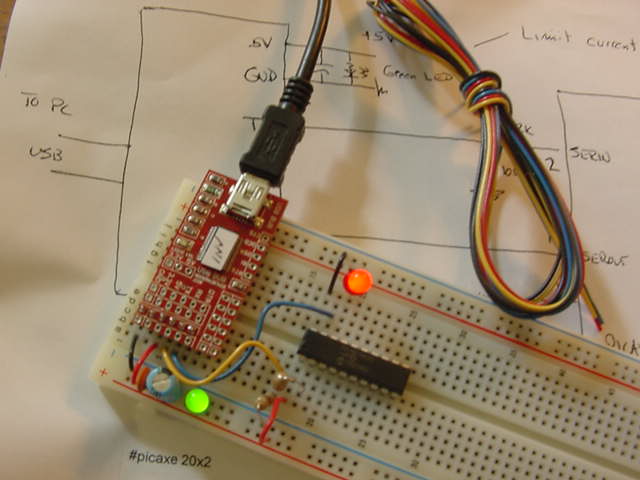
Build a Robot From A Power Wheelchair Part Two: Sensors ... 32013 Views Author's name: weRbots As situations would have it, I have installed and tested the unit with an IR Range Finder, simply by hooking up to the PC board already running the Power Chair. From here I could install four sensors like this one, one at each corner, and as long as the speed was reasonably low, I believe the bot/power chair could navigate it`s way around fairly easily. I believe I will do an experiment with sensors on the serial bus late, because I actually want to be able to remotely control the thing. I believe I want to take an existing remote controlled computer (that is programmable, of course) and use it to allow someone who is willing to hack their power chair, to be able to pull it up beside their car, or even drive it into a van on a ramp. In the stories I hear, a simple inexpensive mechanism to give people a remote controlled chair would be a very big help to disabled power chair users everywhere. Next stop: Wireless Remote Control! Software Listing `------------------------------------------------------------------------------ ` COMPILER DIRECTIVES / SYMBOLS `------------------------------------------------------------------------------ #picaxe 18m2 ` ------------------------------------------------- `-------------------------------------------------- ` PicAxe 18M2 ` Pinout and Definition of Legs `======================================= `(DAC / Touch / ADC / Out / In) C.2 leg 1 `(SRQ / Out) Serial Out / C.3 leg 2 `(In) / Serial In / C.4 leg 3 `(In) old reset is now signal C.5 leg 4 `--------------------------------------- `(gnd) 0v leg 5 `--------------------------------------- `(SRI / Out / In) B.0 leg 6 `(i2c sda / Touch / ADC / Out / In) B.1 leg 7 `(hserin / Touch / ADC / Out / In) B.2 leg 8 `(pwm / Touch / ADC / Out / In) B.3 leg 9 `======================================= `---- package bottom -- direction up ---------- `======================================= `(i2c scl / Touch / ADC / Out / In) B.4 leg 10 `(hserout / Touch / ADC / Out / In) B.5 leg 11 `(pwm / Touch / ADC / Out / In) B.6 leg 12 `(Touch / ADC / Out / In) B.7 leg 13 `--------------------------------------- `(vcc) +v leg 14 `--------------------------------------- `(Out / In) C.6 leg 15 `(Out / In) C.7 leg 16 `(Touch / ADC / Out / In) C.0 leg 17,in0 `(Touch / ADC / Out / In) C.1 leg 18,in1 ` `======================================= `-------------------------------------------------------------- `-------------------------------------------------------------- ` Actual Code starts Here ` by using a prototyping board we can make modifications ` which will allow us to test feasibility of sensors, etc ` using a power Chair Wheelchair ` This version gives us standard IR sensor ` It gives motor control f/b, l/r ` ` *** ` Make the changes on the PCB `-------------------------------------------------------------- `-------------------------------------------------------------- ` ` set these according to the way you wired your board symbol in3 = b.7 symbol en34 = b.2 symbol in1 = b.5 symbol en12 = b.3 symbol IRdet = C.0 symbol i2csda = B.1 symbol i2cscl = B.4 symbol checkVal = w0 `where the sensors talk to the bot symbol IRdetVal = w1 `where the bot sees ahead symbol rRange = b4 `= (w2)range limits symbol lRange = b5 `= (`w2)range limits symbol Xcnt = b6 `= w3 symbol Ycnt = b7 `= (w3) symbol maxStor = w5 `= w5 symbol adc_delay = 5 `Let ADC settle (can be 1 or 0) let dirsb = %10111110 let pinsb = %00000000 pause 1000 ` set motor drivers to known position ` turn all motor enables OFF ` stop everything initi: low en34,en12,in1,in3 let checkVal = 0 `init the check values register to 0 pause 1000 main: `inline checks of robot condition `stop, analyze, react appropriately `make this check so fast it is a blur `monitor the pb, then start the mover forward until strategy gosub updateIR if IRdetVal < 300 then gosub moveForward else gosub holderNute endif pause 500 goto main `---------------------------------------------------- ` Sensing Routines ` updateIR: `Look at the IR det- also monitor and interrupt `load value in a register `use a loop routine that watchs the register `identify corner/front/back and apply appropriate reaction readADC10 IRdet, IRdetVal pause adc_delay `sertxd("IRdetVal : ", #IRdetVal,13,10) return ```````````````````````````````````````````````````````` `` :DRIVE CONTROL ` moveForward: high in3 high en34 pause 10 return moveBackward: low in3 high en34 pause 10 return stopFB: ` stop forward/backward motion low en34 `drive off pause 10 return turnRight: high in1 high en12 pause 10 return turnLeft: low in1 high en12 pause 10 return stopTurn: ` stop right/left motion low en12 `drive off pause 10 return holderNute: low en12 `drive off low en34 `drive off pause 10 gosub moveBackward pause 200 low en12 `drive off low en34 `drive off gosub turnLeft pause 300 low en12 `drive off low en34 `drive off `turn on a light or something return It's Easy To: C - What - I - Can - Do • Sign up - Get ID and Password• Plan and Create a Project That Someone Might Enjoy and May Even Want to Build• Link to your creation on your favorite social networking site or blog.• Become famous! Because your projects get a lot of Hits!
|
By Creators DoctorZoidberg: Converting a Flashlight to LED DoctorZoidberg: Home Project: MUTE TV Wearable TV Muter! DoctorZoidberg: Scare Crow - For Modern Gardens - Home Project jim: CwhatIcanDo Website jim: Tour This Website PaulSandin: Butler, a low-cost mobile robot base WeRbots: BEAM BOT: HexBug Exposed! WeRbots: Buggy Bot: Wire Frame Bot Body WeRbots: Easy Cheap Robot Weekend Project WeRbots: RFL Robot Out Of The Box Experience WeRbots: Robot Man: With Robot Demos WeRbots: Build Your Own Track Drive Robot WeRbots: Build a Robot In 5 Minutes WeRbots: i-Mon App WeRbots: How To Make A Virtual Robot in FLASH WeRbots: Droid From Motorola :: A Robot ? WeRbots: Robots Almost Anyone Can Afford WeRbots: How To Build a Robot in a Box WeRbots: picAxe 18m2 for robotics WeRbots: Build a Respectable Autonomous Robot WeRbots: On Line Neighborhood Watch WeRbots: Pong))))) WeRbots: Roboteer`s Guide to BeagleBone Black WeRbots: Autonomous Robot PVC "Pickup Truck" |
By Keywords Action Script 2: How To Make A Virtual Robot in FLASH Ajax: CwhatIcanDo Website Ajax: CwhatIcanDo Specs: RC2 Ajax: battle Android: Droid From Motorola :: A Robot ? Android: battle batting cage installation: Home Installation of a 4 Section In-Ground Batting Cage BEAM Robots: BEAM BOT: HexBug Exposed! BEAM Robots: picaxe 8m: Wall Follower Mouse gets Majorly Modded BEAM Robots: How to build simple analog balancing robots BEAM Robots: battle Block Watch Cam: On Line Neighborhood Watch Cheap Robot: Easy Cheap Robot Weekend Project Cheap Robot: How To Build a Robot in a Box Cheap Robot: Autonomous Robot Built From Power Chair Wheelchair commercial killer: Home Project: MUTE TV Wearable TV Muter! Convert Your Flashlight to LED: Converting a Flashlight to LED Create a Project: HELP :: How To Create a Project CwhatIcanDo HELP: HELP :: How To Create a Project Do it Yourself: Robots Almost Anyone Can Afford Do it Yourself: Scare Crow - For Modern Gardens - Home Project Do it Yourself: Wheelchair Works 3 Ways: Manual, R/C, and Autonomous Do it Yourself: On Line Neighborhood Watch Droid Smart Phone: Droid From Motorola :: A Robot ? Easy to Make Robot: Easy Cheap Robot Weekend Project entertainment: Home Project: MUTE TV Wearable TV Muter! FLASH Applications: How To Make A Virtual Robot in FLASH HELP: Tour This Website How To: CwhatIcanDo Website How To Build Cheap Bots: Robots Almost Anyone Can Afford How To Build Cheap Bots: How To Build a Robot in a Box How To Website: Tour This Website How To Website: CwhatIcanDo Website Infrared Proximity Sensor: Build Your Own Track Drive Robot IR Detector: Build Your Own Track Drive Robot Lighting Projects: Converting a Flashlight to LED logic analyzer: An affordable Logic Analyzer for the workbench. multi: Multi Media Messaging Device Mute the TV: Home Project: MUTE TV Wearable TV Muter! open source: An affordable Logic Analyzer for the workbench. picAxe: Build Your Own Track Drive Robot picAxe: picAxe 18m2 for robotics picAxe 08m: Robots Almost Anyone Can Afford picAxe 14m: picAxe 14m Motor Driver Board: Make Your Own picAxe 14m: How To Build a Robot in a Box picAxe 18m2: picAxe 18m2 for robotics picAxe 18m2: Weekend Project: Get Started With Robots picAxe 18m2: Build a Robot From A Power Wheelchair picAxe 18m2: Autonomous Robot Built From Power Chair Wheelchair picAxe 18m2: Wheelchair Works 3 Ways: Manual, R/C, and Autonomous picAxe 18x: How To Build a Robot in a Box picAxe 18x: picAxe 18m2 for robotics picAxe 18x: Build a Robot From A Power Wheelchair power wheelchair: Wheelchair Works 3 Ways: Manual, R/C, and Autonomous Quick Build Robot: Build a Robot In 5 Minutes RFL Robots: Building an RFL Inspired Upright Robot Base RFL Robots: RFL Robot Out Of The Box Experience robot bending: Morphibian Land Shark robot bending: Build a Robot From A Power Wheelchair Robot Man: Robot Man: With Robot Demos Robot Motor Control: Build the L298 H-Bridge Motor Control Robot Motor Control: Robot Basics Robot Motor Control: picAxe 14m Motor Driver Board: Make Your Own Robot Motor Control: Buggy Bot: Wire Frame Bot Body Robot Motor Control: picAxe 8 bit Motor Controller: Look Inside Robot Motor Control: How to build simple analog balancing robots Robot Motor Control: Build a Robot From A Power Wheelchair Robot Motor Control: Autonomous Robot Built From Power Chair Wheelchair Robot Pets: DogBot the Robo Dog : Robotic WatchDog Robot Pets: Operation of the Tri-Bot From Wowwee! Robot Pets: Robot Man: With Robot Demos robotics: Droid From Motorola :: A Robot ? robotics: Easy Cheap Robot Weekend Project Robots: BEAM BOT: HexBug Exposed! Robots: Robot Basics Robots: Buggy Bot: Wire Frame Bot Body Robots: Build a Robot In 5 Minutes Robots: Build Your Own Track Drive Robot Robots: Easy Cheap Robot Weekend Project Robots: How To Build a Robot in a Box Rumble Bot Conversions: Robots Almost Anyone Can Afford Security System: On Line Neighborhood Watch Select or type in a Keyword: Converting a Flashlight to LED track drive robot: Build Your Own Track Drive Robot Virtual Pet Robot: How To Make A Virtual Robot in FLASH web: CwhatIcanDo Website web 2.0 site: CwhatIcanDo Website web 2.0 site: CwhatIcanDo Specs: RC2 Weekend Project Robots: Easy Cheap Robot Weekend Project Weekend Project Robots: Weekend Project: Get Started With Robots |
Click To Expand / Contract Menus. View by Creator, Category, Keywords or Number of Views.